The Ultimate Guide to Natural Stone Veneer: 2023

The Ultimate Guide to Natural Stone Veneer: 2023

From the world of home improvement and construction, the use of  stone veneer has been steadily gaining popularity, and it’s no wonder why. In 2023, this versatile material continues to captivate homeowners, architects, and builders with its timeless elegance and remarkable durability. If you’re considering natural stone veneer for your next project, this comprehensive guide will provide you with all the information you need to make an informed decision.

What is Natural Stone Veneer?

Natural stone veneer is a thin layer of genuine stone that is cut and shaped to resemble traditional solid stone. It offers the same aesthetic appeal as solid stone but at a fraction of the weight and cost. This thin layer is typically attached to a backing material for ease of installation, making it suitable for both interior and exterior applications.

Benefits of Using Natural Stone Veneer

1. Aesthetics

One of the most compelling reasons to choose natural stone veneer is its unmatched beauty. Whether you prefer the rustic charm of slate or the classic elegance of limestone, natural stone veneer offers an array of textures, colors, and patterns to complement any architectural style.

2. Durability

In 2023, homeowners are prioritizing durability, and stone veneer delivers. It can withstand harsh weather conditions, making it an ideal choice for exterior siding, and it can last for generations when properly maintained.

3. Eco-Friendliness

Natural stone veneer is an environmentally responsible choice. It is a natural material that requires minimal processing and is sourced sustainably. Using it in your construction or renovation projects can contribute to a more eco-friendly home.

Popular Applications for Stone Veneer

The versatility of natural stone veneer allows for a wide range of applications:

1. Fireplaces

Transform your fireplace into a stunning focal point with the timeless beauty of natural stone veneer. Whether you prefer a traditional or contemporary look, there’s a veneer option to suit your style.
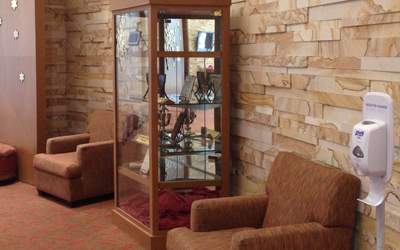
2. Accent Walls

Elevate the aesthetic of any room by creating an eye-catching accent wall with stone veneer. It adds depth, texture, and a touch of luxury to your interior spaces.
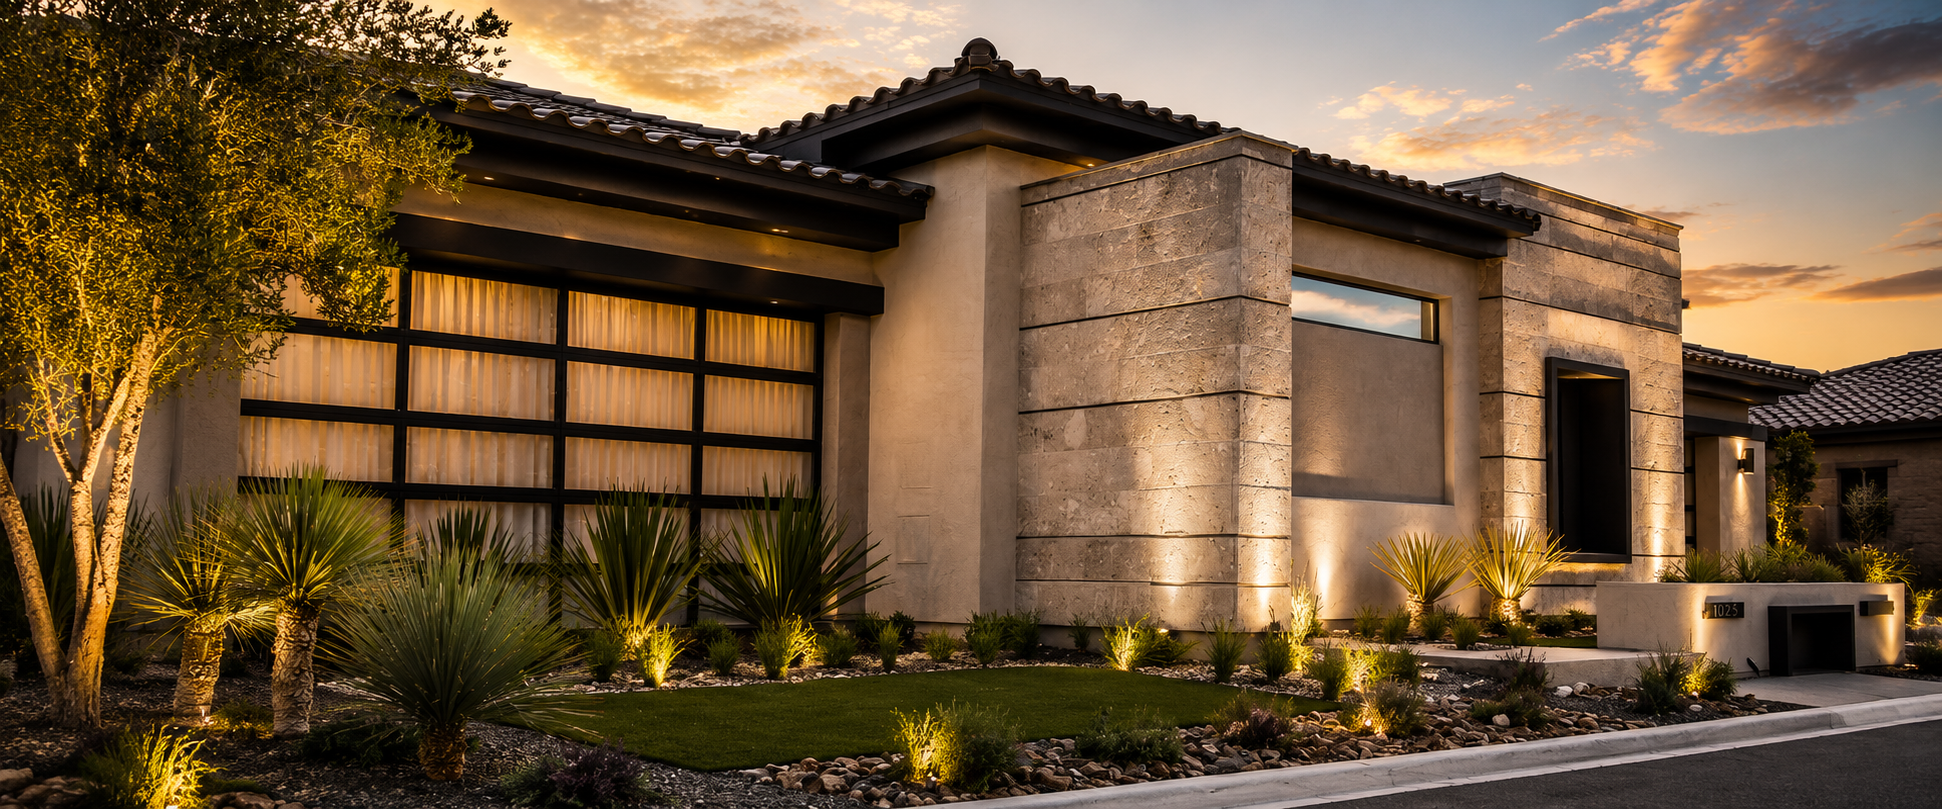
3. Exterior Siding

Enhance your home’s curb appeal with the durability and elegance of natural stone veneer siding. It’s available in various profiles and finishes to match your design preferences.

4. Landscaping

Stone veneer isn’t limited to indoor use. It can also be used to create beautiful outdoor features such as garden walls, pathways, and water features, adding a touch of nature to your landscape.

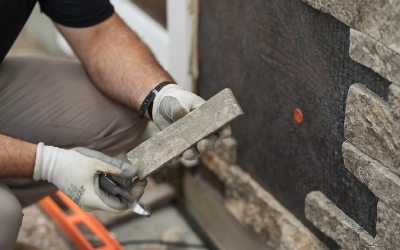
How to Install Custom Stone Veneer

While professional installation is an option, many homeowners in Las Vegas, Arazonia and all over the world, are exploring the DIY route. Here’s a simplified overview of the installation process:

  1. Prepare the Surface: Ensure the surface is clean, flat, and structurally sound.
  2. Apply a Moisture Barrier: Install a moisture barrier to protect against water infiltration.
  3. Mix Mortar: Prepare mortar according to the manufacturer’s instructions.
  4. Apply Mortar: Spread mortar on the surface and back of the stone veneer.
  5. Set Stones: Place stones onto the surface, pressing firmly to ensure a strong bond.
  6. Grout and Seal: Fill gaps between stones with grout and seal the veneer to protect it from the elements.

Maintenance and Longevity

To maintain the beauty and durability of your natural stone veneer, follow these maintenance tips:

  • Regularly clean the surface with a gentle cleanser and a soft brush.
  • Apply a stone sealer to protect against stains and moisture.
  • Inspect for any loose or damaged stones and repair them promptly.

Sustainability and Eco-Friendly Aspects

In a world increasingly conscious of sustainability, natural stone veneer stands out as an eco-friendly choice. Its minimal processing and natural origins make it a responsible material option. Additionally, its thermal mass can contribute to energy efficiency in your home.

Choosing the Right Stone Veneer

When selecting natural stone veneer for your project, consider the following factors:

  • Climate considerations (suitability for your region’s weather)
  • Architectural style and design preferences
  • Budget and cost considerations

Cost Considerations and ROI

While there may be a higher upfront cost compared to some alternatives, it offers long-term value. Its durability, timeless appeal, and potential to increase property value make it a worthwhile investment in your home.

Conclusion

In 2023, Stone Veneer continues to shine as a popular choice for homeowners and builders looking to enhance their properties. Its aesthetic appeal, durability, and eco-friendliness make it a standout option. By following the guidance in this ultimate guide, you’ll be well-equipped to make informed decisions and create stunning, enduring projects with natural stone veneer.

Remember that each project is unique, and it’s essential to consult with professionals or suppliers for specific advice and product recommendations tailored to your needs. To view samples and ask questions, visit www.naturalstoneveneer.com

Key differences between man-made stones or natural stones

Key differences between man-made stones or natural stones

Whether it is upgrading a fireplace or adding a feature wall, homeowners often debate between man-made stones and natural stones. Choosing between the two can come down to personal preferences as well as important factors such as cost, texture and color. Let’s look at some of the key differences between the two.

Man-made stones are manufactured by using technology to mimic the realistic qualities of a natural stone such as texture and color. With time, technological advances have allowed man-made stones to be manufactured in large quantities which helps create a lower price point for the stone. Since man-made stones are manufactured, their colors are created with pigments that are just found on the outside while being concrete on the inside. Natural stones are quarried from the earth and their beauty lies in their features of imperfection, raw textures and color variations that have been formed over millions of years. This beauty lies throughout the stone itself.

Natural stones are vastly unique. No two stones are alike. The color of the natural stone is acquired from the minerals found in the stones. These minerals give the natural stones their personality and they can withstand any environment, which is one of the reasons why they maintain their color and texture throughout their life and uphold their value. Natural stones are more durable and ever-lasting. The same can’t be said about man-made stones. Man-made stones can deteriorate over time and can be damaged when exposed to natural elements like sunlight, dirt, oil, rain and wind.

When selecting a stone for your next home project, keep in mind the differences and make an informed decision to get the best outcome possible. It is very important to go through the pros and cons. This will ensure that there are no surprises at the end of the project. Oftentimes, the price of the stone is the only aspect kept in mind without realizing the installation cost of the final project.


5 five essential tools needed to install Natural Stone Veneer

5 five essential tools needed to install Natural Stone Veneer

Stone veneer is one of the most sought-after naturalized stones on the market. And for good reasons too. With its incredible natural texture, stone veneers deliver the rugged beauty of the outdoors. Additionally, installation is relatively easy, making for a DIY- friendly project.

Stone veneer comes in several different types, and the exact preparation and process will vary somewhat depending on the product. The manufacturer’s instructions are the best source of precise directions on preparation, installation, and maintenance.

 Many tools and materials can aid in installing your stone veneer project. You can get most of your tools from various hardware stores or specialty masonry vendors/stores.  Ask any honest contractor, and they will tell you that they’re only as good as their best tools. Below are a few basic installation tools needed for a stone veneer project to enhance your home.

Tool #1: Trowels

Notched trowels come in different sizes based on the type of product being installed and how big a notch it requires—wondering what size is best? Most stone veneer panel guides have a trowel size recommendation listed. 

Notched trowels are used for spreading scratch coat and bond coat mortar. When it comes to the size of your notched trowels, the important thing is if they leave a consistent amount of mortar down to set your tiles. The main purpose of the notches is to give the mortar a place to adhere to once the tile is installed and compressed down. 

A notched trowel often has at least one or two sides of the trowel cut out with a certain shape, creating the trowel’s teeth to butter or spread mortar and create a pattern. This pattern and the dimensions of the teeth dictate what kind of indent the trowel creates when smoothing the setting materials.

Tool #2: Masonry hammer or angle grinder. 

A masonry hammer is an ideal tool if you’d like to chisel or finely shape any stone edges to your exact liking. But perhaps the most efficient method for trimming veneer is through an angle grinder equipped with a diamond blade, making it easier to cut off any loose ends and ensuring a smooth installation. 

Pro tip: cuts made at an angle from the backside at a ½” (12mm) depth will allow the stone to be broken easily with a small hammer along the cut line, leaving a more refined natural edge on the front side. Before installing, ensure that pieces are free of any debris or loose concrete that could impede the bond.  For best results, use a 4”-9” grinder.

Tool #3: Mortar

More a workable paste than a tool, Mortar is the adhesive to which the stone veneer sticks. A mortar scratch coat is the foundation of any stone veneer wall. Veneer stone mortars can be mixed by hand or machine. The size of the project will determine the best method for mixing. If it’s a small project like a fireplace or an accent wall, then mixing by hand is best practice. Mix a batch of mortar to a firm, workable consistency. 

Pro tip: properly prepared mortar will hang steadily on a trowel held at a 90-degree angle. The best mortars to use are type N or S mortars with varying strengths. Type N is the most commonly used mortar for general purposes such as soft stone masonry,above-grade walls, and chimneys. Type S mortars are a powerful blend. So strong they are soil, wind, and seismic load resistant, making for an ideal choice for brick patios, sewers, maintenance holes and other exterior masonry projects. 

Tool#4:Brushes/Sponges 

Working with mortar and using a grinder or masonry hammer can be a messy job. Mortar can be hard to work with when it oozes through the cracks or onto other stone pieces. The filmy residue that mortar leaves behind can dull the appearance of the stone and should be removed immediately with sponges. Use a stiff bristle brush and water to clean the area of debris.

Pro tip:  do not allow mortar to dry on the face of the stone. Keeping your hands and your stone veneer clean is the most important tip on this list. Brushes and sponges should be used throughout your project for a clean, professional look. 

Tool#5: Grout bag and joint tool.

And finally, what would our list be without the sealant and tool of all tools, the joint tool. Once your stone veneer is laid nicely, use a piping bag or a grout bag mixed with the mortar solution to fill in the gaps between the stone. You can use whatever pre-blended mortar you used before to make a scratch wall. Applying grout helps to hold the veneer in place over time. Think of it as an extra layer of protection. As the grout begins to dry, smooth out the path with a joint tool.

Pro tip: Once again, try not to smear any grout onto the stone face. You’ll know the mortar is ready to be smoothed when it falls away like sand.  If, by chance, some mortar gets onto the stone, allow it to dry, then brush away with your stiff brush.

The best way to clean and disinfect Natural Stone at your house from Covid-19 and other microbes

Every type of natural stone, counting slate, granite, marble, limestone and dolomitic limestone, are naturally resilient to germs and bacteria.
Nonetheless, you can take measures to avoid microbes from staying inside the pores and holes of your stone. It’s true that the coronavirus, specifically Covid-19 is not a pleasant germ. Fortunately like all the other family members of the coronavirus, health experts agreed that it can be cleaned by taking good disinfecting steps.

“There are many bad things about the coronavirus, but there is one good thing: It is not very hardy,” said Dr. John Swartzberg. “It is easily destroyed by most disinfectants.”

Below are some easy tips to disinfect and clean your granite and Natural Stone from Bacteria, Coronavirus, Covid-19 and other microbes.

Remove Loose Debris and Dirt

It is important to make sure you don’t leave sand or any other particles that might scratch the stone surface. Therefore, you can use a vacuum but preferably a broom. That will help you avoid scratching the floors with vacuum wheels or any plastic or metal attachments by repeated use.

Use Soap and Water

Some products promising to disinfect and clean might leave streaks and could harm limestone, marble, granite, travertine and other types of natural stone. We recommend you mix antibacterial soap with some warm water and scrub the surface needed. After you finish that step, wipe the surface again with a wet towel to remove any leftover soap. Finally, remove moisture with a dry towel.

Ingredients to Avoid

When it comes to choosing a cleaner make sure you use a stone safe product to avoid damaging the stone. We advise you to avoid cleaners containing vinegar or other acidic ingredients. These ingredients can diminish the shine and harm the finish of the natural stone surfaces. In addition, chlorine bleach, commercial window cleaners or other all-purpose cleaners can also cause etching in natural stone and should be avoided.

Discouraging Microbes and Covid-19 on the Surface

To minimize the risk of contamination always use a cutting board and clean the surface as advised, before and after preparing food so that food bacteria do not sit on the limestone surface. The CDC, the World Health Organization and other health organization advise to wash one’s hands and disinfect any frequently touched surfaces on a daily basis. This will help prevent Covid-19 from spreading.

Cleaning Exterior Natural Stone

We highly recommended cleaning and disinfecting high-touched surfaces. However greater fields of stone veneer and tile can make it a challenge to do a normal cleaning procedure on a regular basis. We recommended you to contact technologically advances professionals that offer residential spray services to help you have a disinfected and coronavirus free house.

Bottom Line

Having a clean exterior or interior natural stone seems like a good idea. Make sure to follow the given tips correctly for safe and sanitized surfaces and help prevent the spread of coronavirus. However, if you have any other question or request make sure to contact Natural Stone Veneer. We offer our customers free estimates, without obligation.…

3 Tips to Make Exterior Stone Veneer Look Perfect on Your House

You often see people advising you not to judge a book by its cover. You might have to put this advice aside when it comes to the exterior of your house. In this particular case, you cannot help forming an opinion about a house based on its exterior looks.

The better the exterior, the higher the property’s resale price will be. There are a few tactics, which can add up to the overall appeal of your house when installing stone veneers.


3 Tips To Make Exterior Stone Veneer Look Great On Your House

1. Prepare The Surface Of Exterior Walls For Stone Veneer Installation

The first and foremost tip is to focus on the exterior surface, as various products can be poured directly onto concrete walls. However, if your house’s exterior is made of plywood, you should either place metal lathe and vapor barriers over it or do a stucco scratch brown coat.

After making sure that your exterior surface is perfect for the outdoor stone veneer, arrange the following instruments/tools that you would need to install exterior stone veneer.

      • Tape measure
      • An empty bucket
      • Sponge
      • Spacers or shims
      • Mortar drill mixer
      • Mortar or thinset
      • A wet saw
      • A notched trowel

2. Place the Stone Veneer Smoothly

Start with washing off the stones thoroughly. Now take the exterior measurements and tape it on the ground. Now, lay the rocks inside the taped square on the floor to see if the rocks will cover the whole wall and merge well.

The next step is to start trimming the rocks according to the structure you want. Also, this way you can test if the color combination of rocks look good when placed together. Moreover, trending stone veneer consist of stones with smooth corners. Also, remember to keep the stones damp before the installation, as it will prevent the absorption of moisture from the mortar.

Tools to trim the rocks:

      • Wet saw
      • Circular saw
      • Chisel
      • Maul

After trimming and testing the stone veneer on the ground, start preparing the Mortar.

To get the best mortar mix, combine 2.25 liter water with type S and N cement. Mix until the mixture gets thick. More water can be added, if needed. Make sure that the mixture consistency is not too drippy, instead a dense mixture will be great. Outdoor stone veneer will only stick well if the mixture is strong enough to hold the stones and stick to the exterior walls of the house.

The best tactic to apply mortar is to apply mortar mixture at the bottom corner. Secondly, place double layer of mixture on the back of the stone veneer, and press the mixture on the exterior. Press until it sticks permanently.

3. Clean and Conceal the Stone Veneer

Cleaning the wall is easy. You can rinse a sponge in water and clean the walls right on the day of installation. However, grout the gaps in the stones if you see any. The grout will prevent water from going inside the gaps and cause dislodging of the stones later. Wait for 48 hours before you seal the wall. It is just an optional step for those looking for further color enhancements.


Bottom Line

Installing an exterior stone veneer seems an exciting idea. Also, it’s easy to install, but the end product will only turn great if the instructions are followed correctly. However, one way of making sure your exterior stone veneer installment looks perfect is to approach natural stone veneer. We have the best plans for the installation and maintenance of the residential and commercial exterior stone veneers.